|
|
|
Damn companies like Nvidia...can't they
make an effort to make their chips flat??? Another thing that pissed me
off...ever heard of the story - "The Little Yellow Component That Got In
The Way"? Pretty long title eh..? ![]()
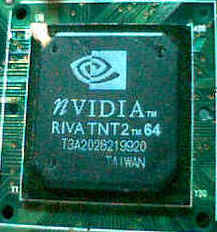 |
Alrighty, first things first. Typical of companies like our good friend Nvidia here, this chip was made nowhere near flat. Mine was a little convex, so when I used the thermal tape in Part I, the heatsink would have stuck to only the outer parts of the core. No point in that right??? Anyways...LAPPING TIME!!! |
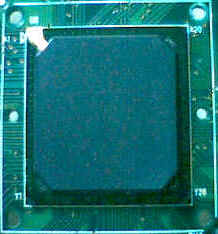
BEFORE AFTER
Looks so much better doesn't it? |
Things
you'll need here: Your flat piece of whatever (now, if
you're using metal, be sure to lap that too...), Sand
Paper - one 220 grit and one 800/1200 grit, a tooth brush and double sided tape. As for the flat piece thingy, 40mm²
will do fine to lap the entire chip. It can't be too big, because of all
those little components that surround the core. Height? Well, that's
up to you, I guess it depends on how big your hand is... I attached the 800 to my
name tag using double sided tape and started sanding away! Be sure to watch out for
those pesky little components on the board. I busted one
off while doing my Part I, but a little solder and guts
got it back on the board! I brushed off the chip and surrounding areas using my tooth brush and then cleaned the chip using Nail Polish Remover. Now, this can leave a little residue behind, be sure to wipe it off with a damp rag before continuing. Alcohol works good too. Alright, we shall leave this guy for now and start preparing the heatsink. |
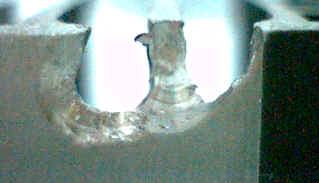
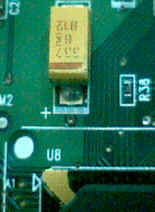 - That damn yellow component...
|
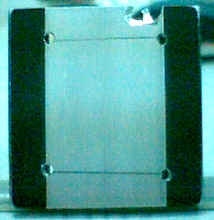
The
heatsink. *sigh* This guy was so large, there was a small
yellow component on the board that got in its way. And
now, since we're gonna be using thermal grease this time,
we're gonna need a retention mechanism to hold this big
guy up! Here's where the drill & cable ties come into action. And I'm
sure you're smart enough to choose drill bits that are for metal... |
Not so straight...but what the heck... |
I started off by measuring the
distance between the four holes that surrounded the TnT2 chip.
(there's actually six holes there, but the ones on every corner will
do fine.) Then I marked their positions on the heastsink. I also marked off the part that was being blocked by that
pesky little component.
Now it's...DRILLING
TIME!!! I placed the bit properly over the marked off spot on the
heatsink. Then I inserted the 2.5mm drill bit and...*whirrrrrrr.....bZZZTT!!!*
"What the %^&#???" The damn drill fizzled out on me!!!
So much for the 500W... Well, after some inspection it turned out that
it wasn't the drill - it was the damn extension cable I was using...I
just threw that out of my sight and grabbed another... *...whirrrrrrr....cLaNk!!* A HOLE! one down, 3 to go. I just continued with the rest of the holes and this is what I ended up with... |
That's one nasty hole!!! |
I then took out the 2.5mm and replaced it with a 4mm. This was to make way for that pesky yellow component on the board. Too bad I didn't have a jigg-saw...it would have made life so much easier...*whirrrrr....!!!* 'hmm...hole looks pretty big...lets see if it fits." I placed the heatsink on the TnT2...and it didn't fit!!! AAAAA!! grrr...I pulled out the 4mm and replaced that with a 6MM!!! MUAHAHA! *whirrrrr............!!!!* "THAT IS ONE HUGE HOLE! Lets try it..." I placed it...IT FITTED FINE!!! WOOOOOOOHOOOOOOOOOOOOOOOOOOOOOOOOOOO! |
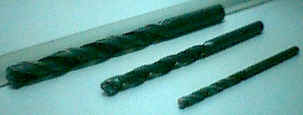 -
The drill bits...
-
The drill bits...